The bench in numbers
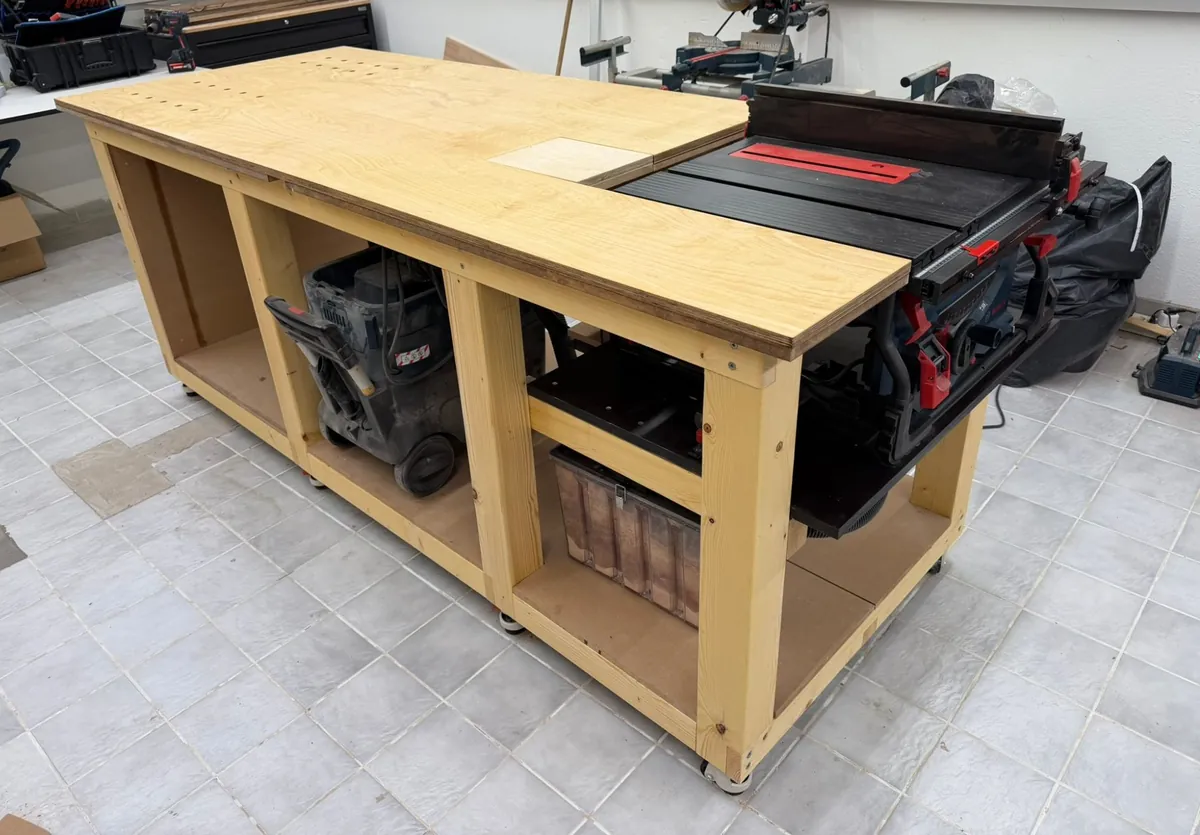
The key data come from the workshop plan the planner produced for this bench:
| Size (L × D × H) | 2500 × 1000 × 1000 mm (about 98½ × 39⅜ × 39⅜ in), height = working height |
|---|---|
| Worktop | 21 mm birch plywood (replaceable) + 19 mm MDF = 40 mm (about 1⅝ in) |
| Frame | Spruce, 2380 × 920 mm |
| Legs | 8, 100 × 100 mm (about 4 × 4 in), 860 mm long, 4 leg pairs |
| Rails | Top and bottom 80 × 60 mm |
| Joints | Half laps, glued |
| Feet | 8 swivel casters Ø 75 mm (3 in) under the frame, all with brake, mounting height 100 mm |
| Shelf | Full length, 18 mm, top edge 198 mm above the floor |
| Bracing | Bracing panels at the left end and at the back, the saw bay stays open |
| Table saw | Back right corner, fed along the bench |
| Scope | 38 parts, 81 joints |
| Weight | About 181 kg (400 lb) – a rough estimate without machines, tools and dust extraction |
Why build the saw into the workbench?
A table saw on its own stand takes up floor space – and more all around it as soon as long boards run through. Built into the workbench, saw and work surface share one footprint, and the worktop takes on a second job:
- Outfeed: the saw sits lengthways in the corner; after the cut the workpiece runs out over the worktop instead of tipping off the saw table.
- Support: large sheets lie on the whole bench while you cut them.
- One station on casters: saw, workbench and shelf move together to wherever there is room.
When the saw sits lengthways in a corner, the planner reminds you: “The workpiece runs out over the worktop – keep it clear.” It keeps room to stand in front of the bench end and room at the open long side for the fence rails as they slide out – both planning values, not manufacturer data.
How it was planned
In the planner the bench starts as an assembly bench. What turns it into a saw station is a handful of settings:
- Size: 2500 × 1000 mm and 1000 mm working height under Settings › Basics › Dimensions. Which height suits you is worked out by the workbench height calculator.
- Casters: under Basics › Feet “Casters”, under “Caster and levelling foot details” “Under the frame”. The planner puts a caster under every leg – eight on this bench. Under “Casters with brake (lock)” “All casters” is chosen.
- Saw: under Equipment › Table saw “Install table saw”, position in the bench “Back right”, feed direction “Along the bench (outfeed over the worktop)”.
- Saw dimensions: on this bench they were measured on the saw itself and entered under “Model” › “Enter your own dimensions”. If your model is not on the list, do the same and then tick “Installation dimensions measured on the machine”.
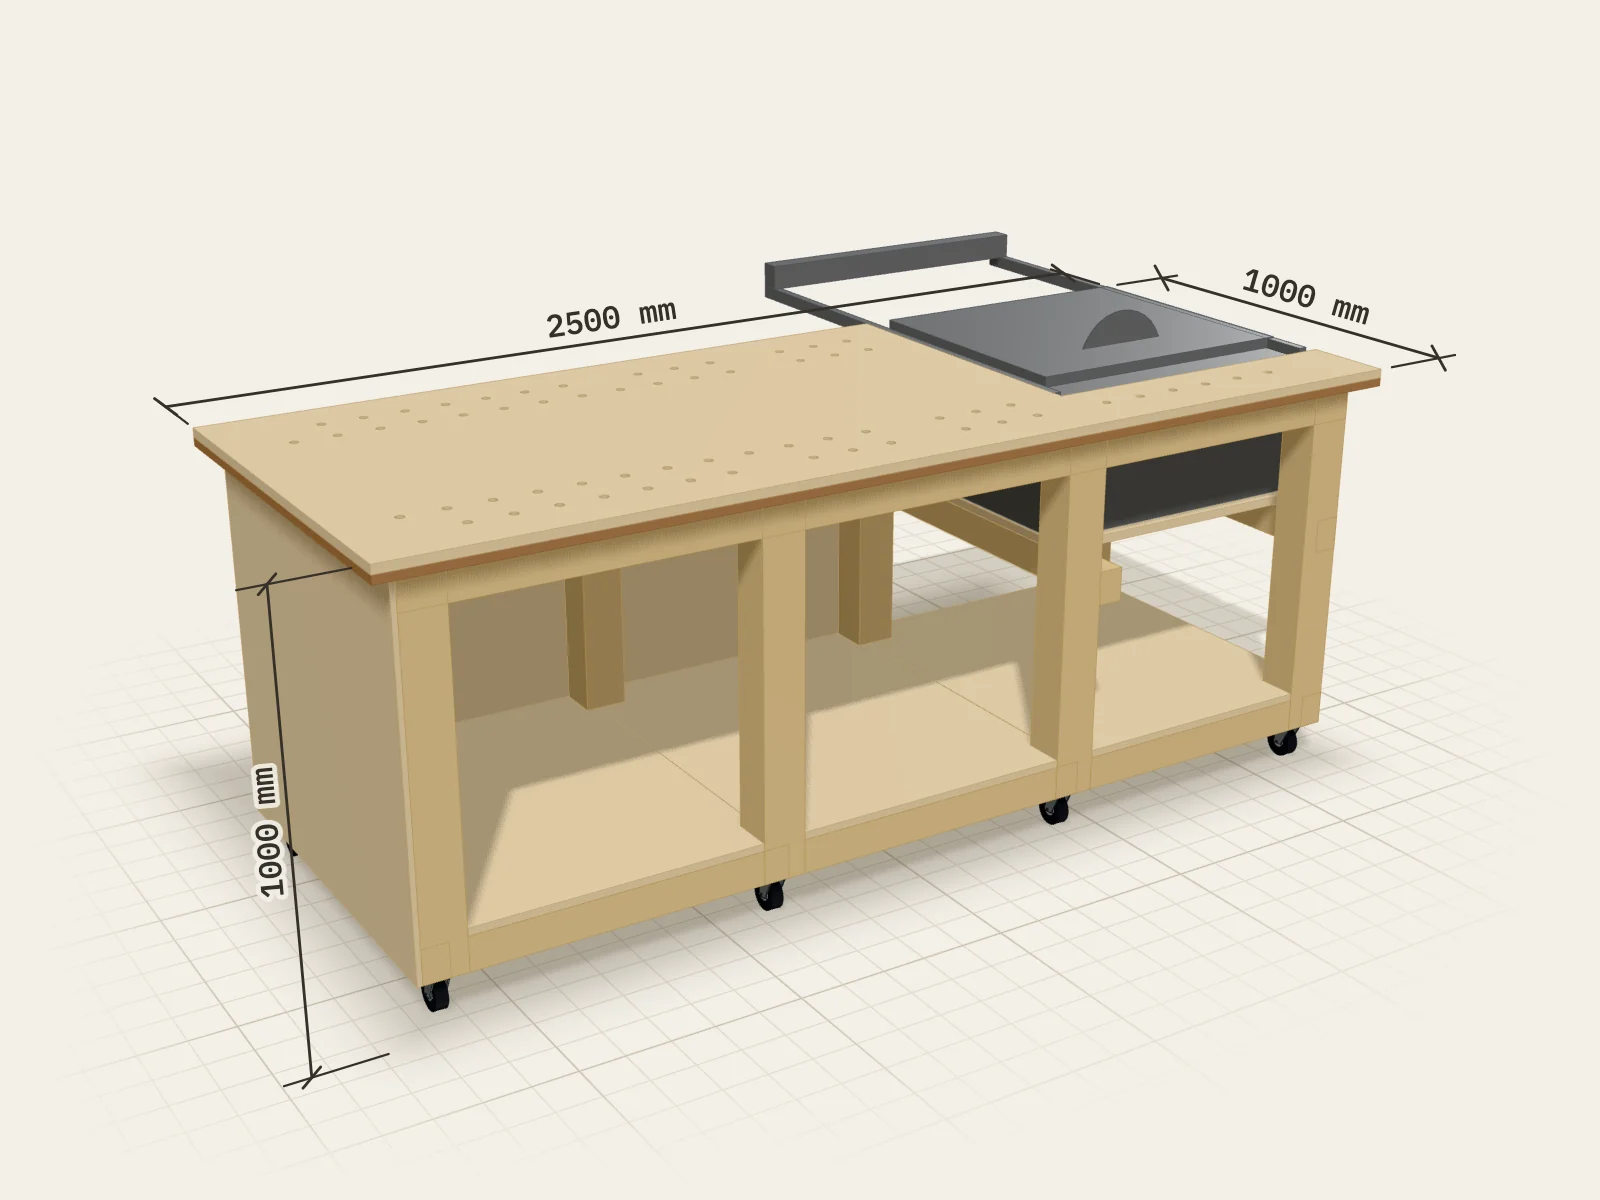
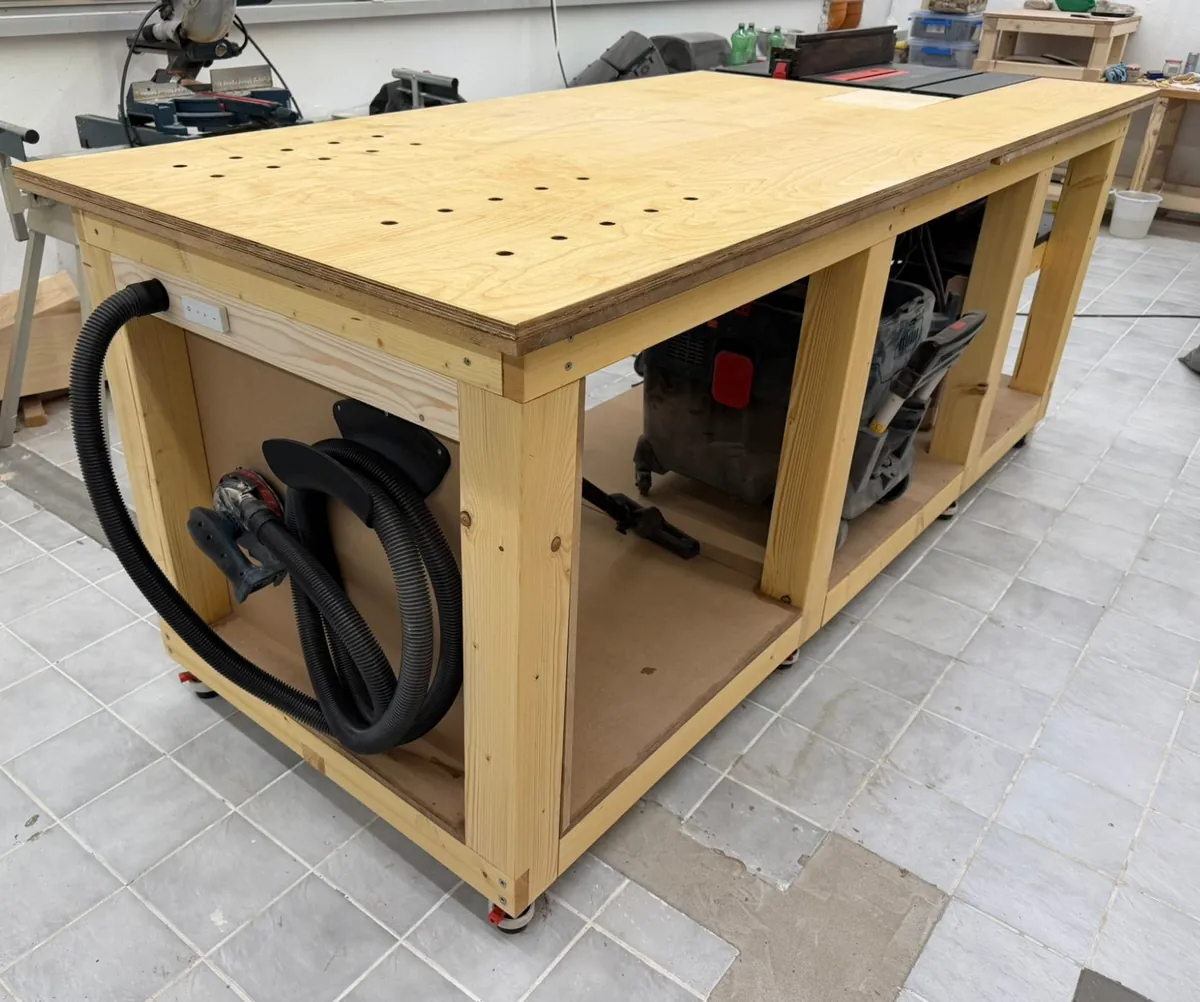
From these settings the planner cuts the opening into the worktop, plans the substructure and the mounting plate for the saw and shortens the leg under the saw. The saw bay stays open at the back – so the saw can be reached for dust extraction, cables and maintenance – and bracing panels stiffen the other bays.
What comes out is a build plan as a PDF: parts list, shopping list, cutting plans for timber and sheets, and the assembly in 14 steps – from “Cut and machine the parts” and “Build the table saw substructure” to the “Final check”. The free sample pages (PDF) show what such a plan looks like.
Three steps from the build plan
The workshop plan takes you through the build step by step – with a drawing for every step, the parts and the fasteners. Three steps from this bench's plan:
-
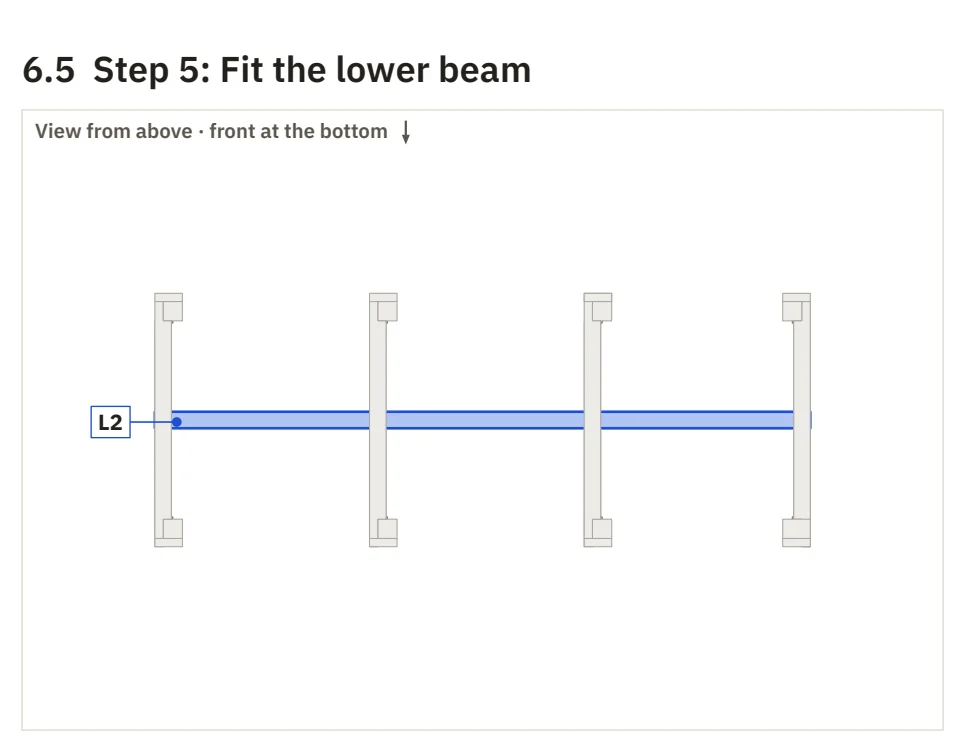
Step 5 “Fit the lower beam” -
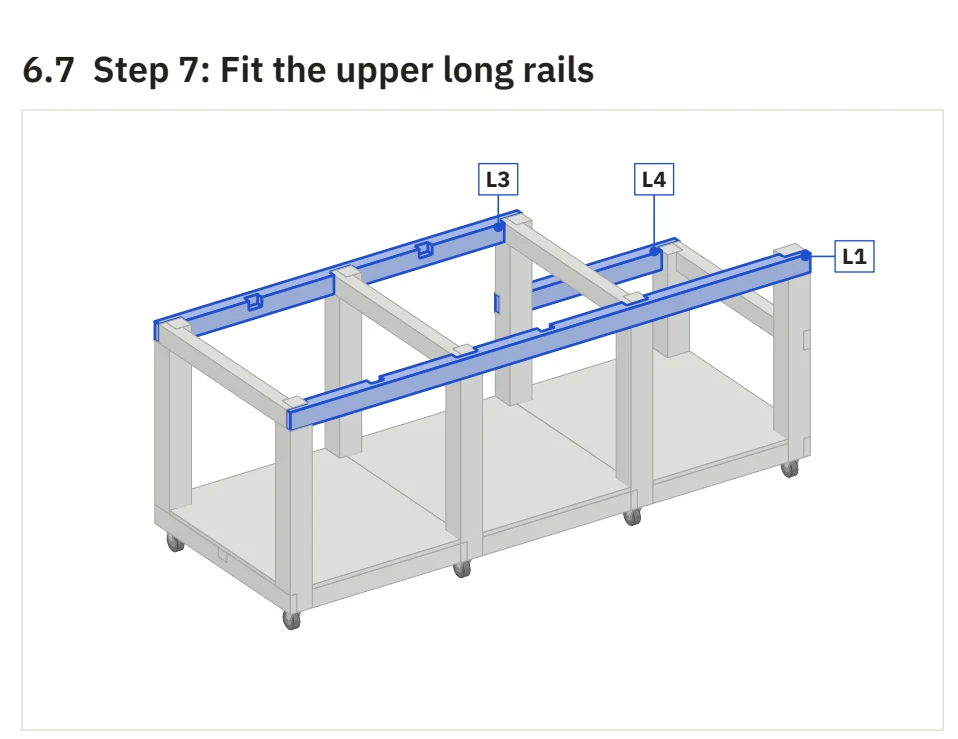
Step 7 “Fit the upper long rails” -
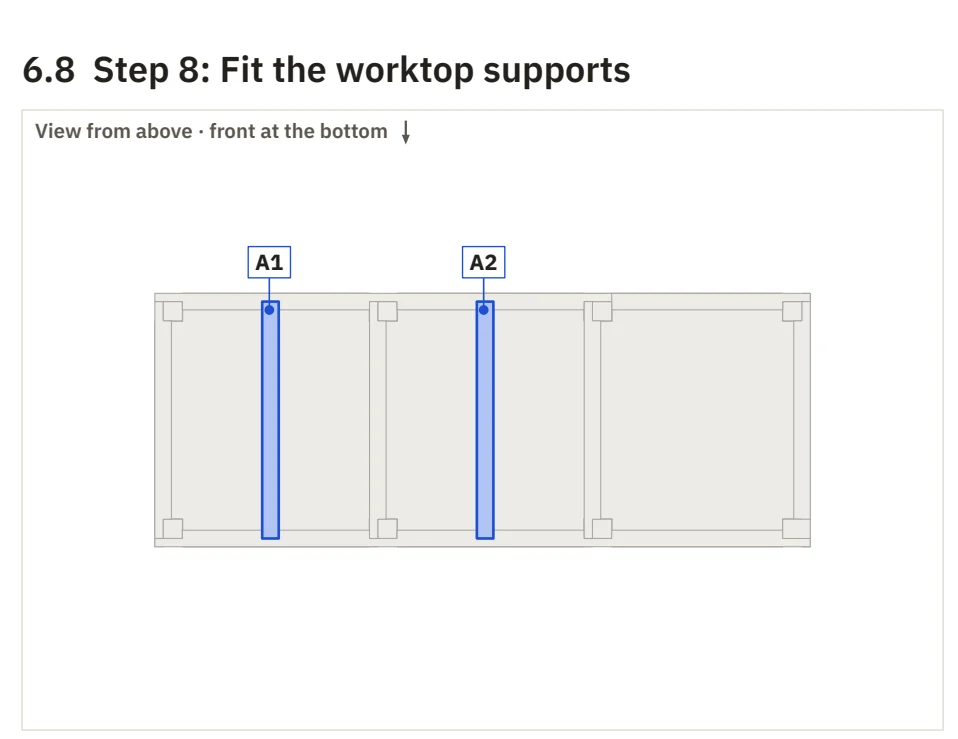
Step 8 “Fit the worktop supports”
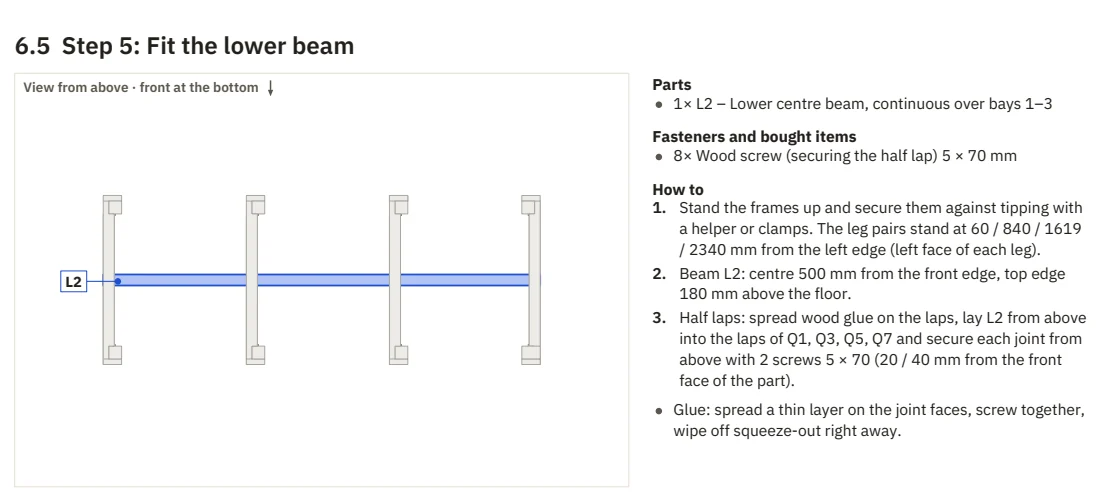
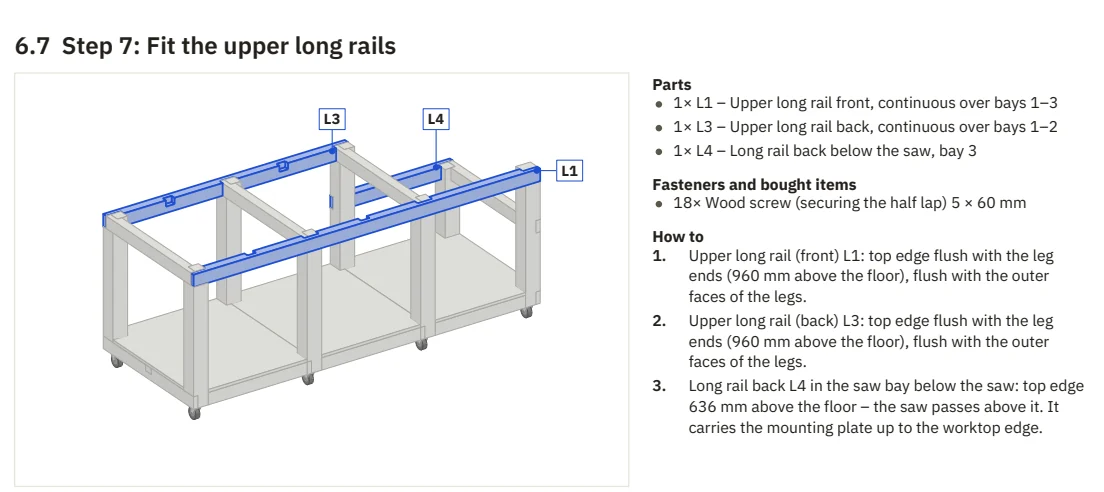
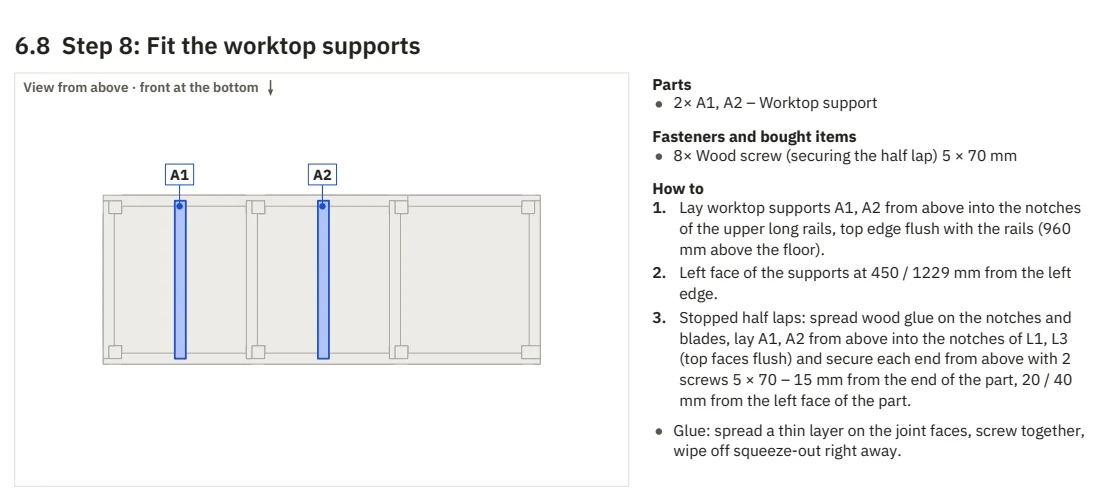
Click a drawing to open the whole step with its parts list and instructions.
Installing the saw: mounting plate and opening
The saw does not hang in the worktop; it stands on its own mounting plate inside the frame. The plate sits low enough for the saw table to be flush with the worktop. How low exactly depends only on your saw: on its height from the surface it stands on to the top of the saw table.
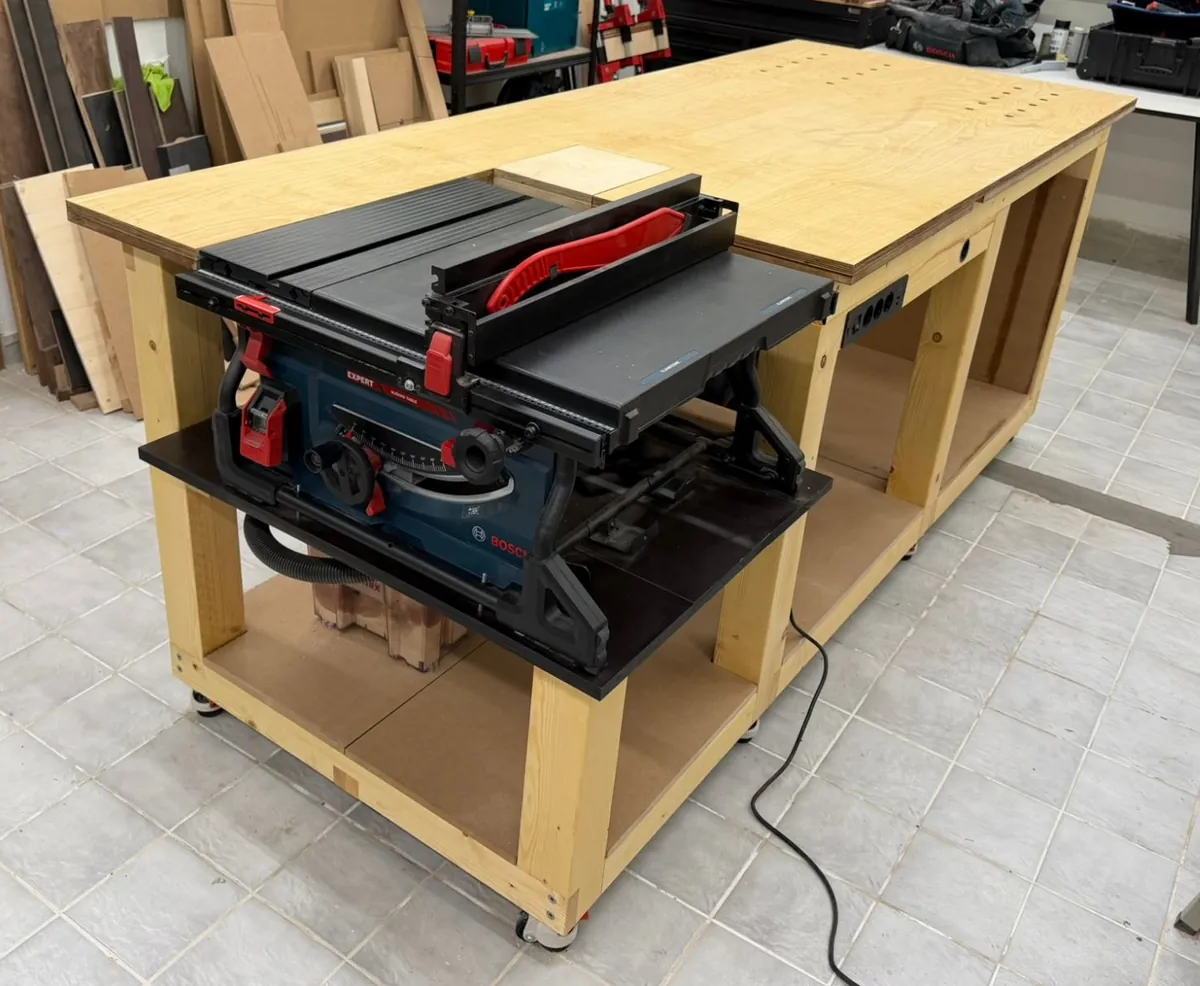
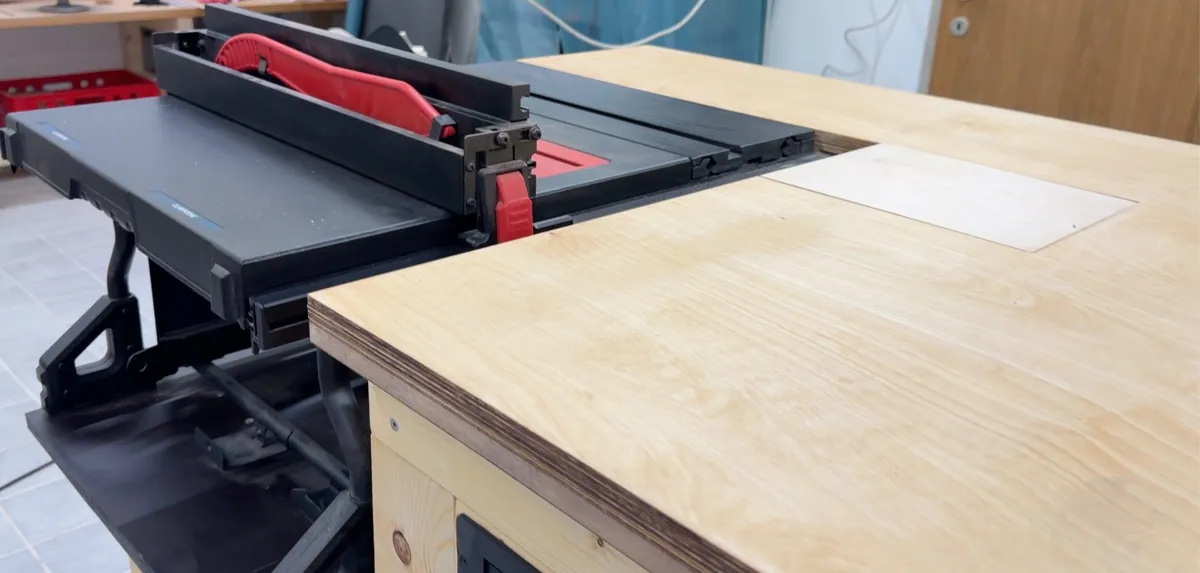
Measure the saw first, then cut the opening. Published outer dimensions often include fence rails, a crank or handles – installation dimensions are measured on the machine.
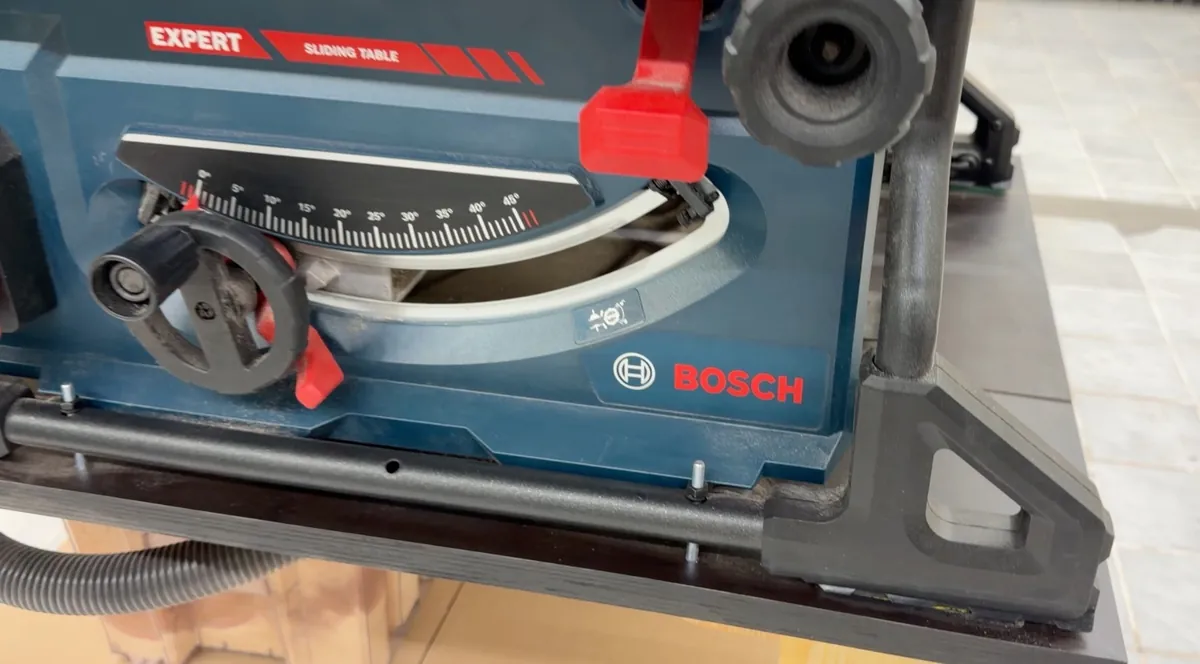
The planner gives you two notes for this: “Saw dimensions not measured on the machine” as long as “Installation dimensions measured on the machine” is not ticked, and “Take the mounting holes from your own saw and transfer them to the mounting plate. The program does not know the hole pattern.” In the build plan the substructure is a step of its own, “Build the table saw substructure”, followed by “Fit the worktop (core layers)” and “Install the table saw”.
Worktop and dog holes
The worktop has two layers: 19 mm MDF underneath as the core layer and 21 mm birch plywood on top – 40 mm (about 1⅝ in) together. The birch is planned as a replaceable wear layer: it is screwed on from below, and in the build plan that is a step of its own, “Fasten the wear layer”. Once it is scratched and sawn into after a few years, a new one goes on.
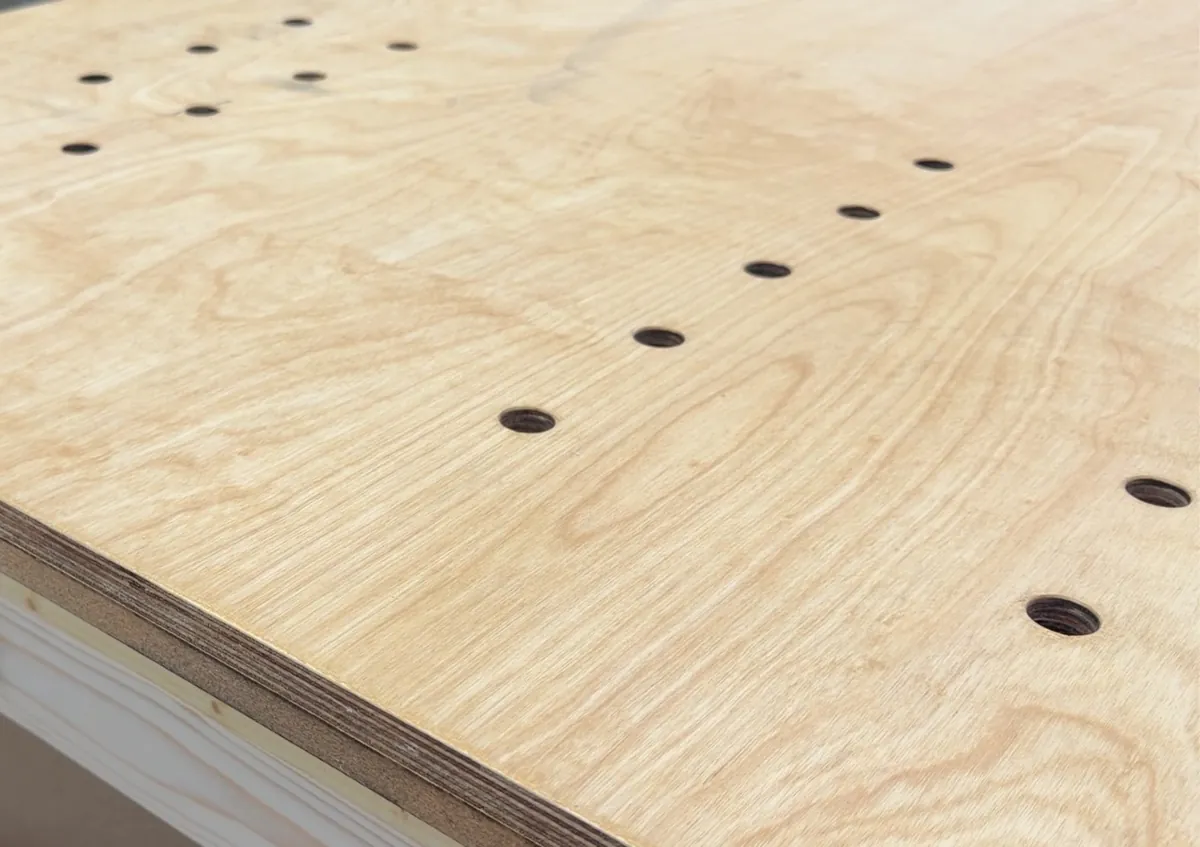
The holes take bench dogs and clamps. In the planner they are called dog holes: under Equipment › Dog holes you set the hole diameter, the spacing, the distance from the edge, the rows and the area of the worktop. Where the saw opening is, or a rail runs underneath, the planner leaves the grid positions out.
On this bench the dog holes are only partly drilled so far – the builder drills the rest as needed.
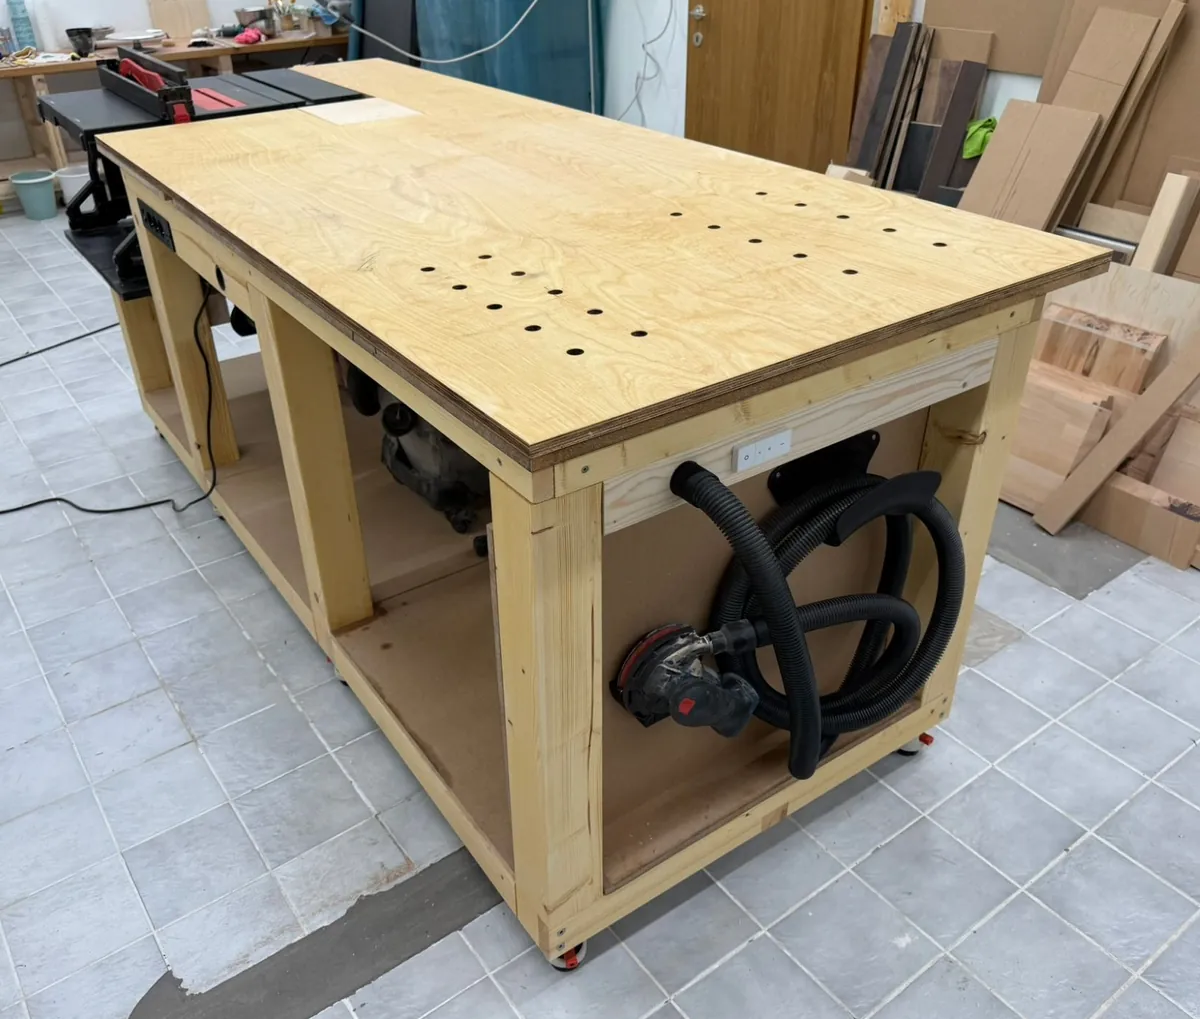
Frame, shelf and casters
The frame is spruce: eight legs of 100 × 100 mm (about 4 × 4 in) in four leg pairs and rails of 80 × 60 mm, half-lapped and glued. At the bottom there is a full-length shelf. Bracing panels stiffen the bays at the left end and at the back – important, because the bench stands on casters and must not give while you saw. Under every leg sits a swivel caster with a lock.
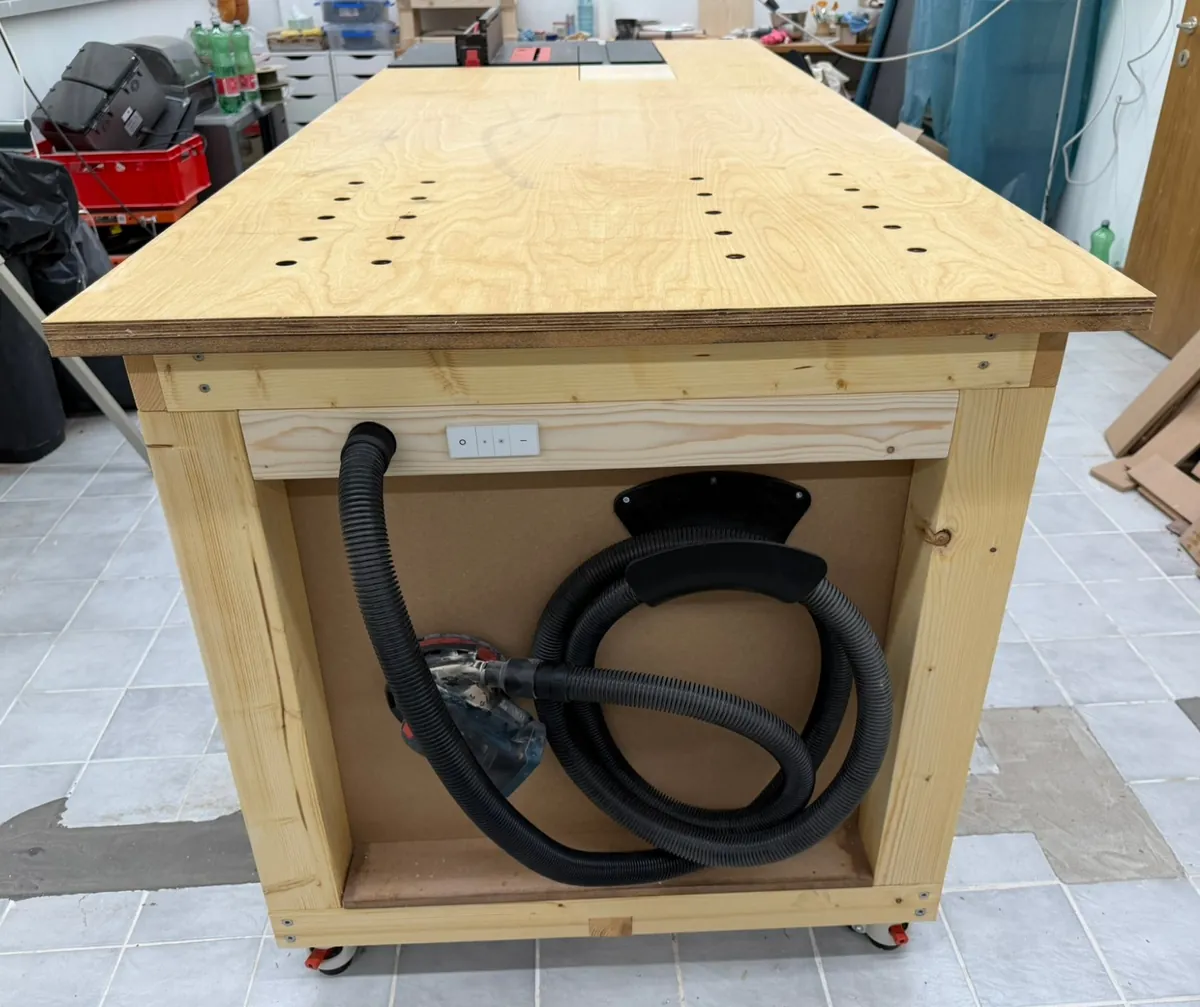
Casters, brakes and load ratings are covered in more detail in a guide in German: Werkbank mit Rollen bauen.
Added afterwards: the dust extraction
The dust extraction stands out in the photos: a cyclone separator with a clear collection bin, a shop vacuum in the compartment, hoses and pipes under the worktop, a control box and a switch at the end. The builder added the dust extraction afterwards; it is not included in the weight and cost above.
The plan leaves room for it: the saw bay stays open at the back, where the saw can be reached for dust extraction, cables and maintenance.
-
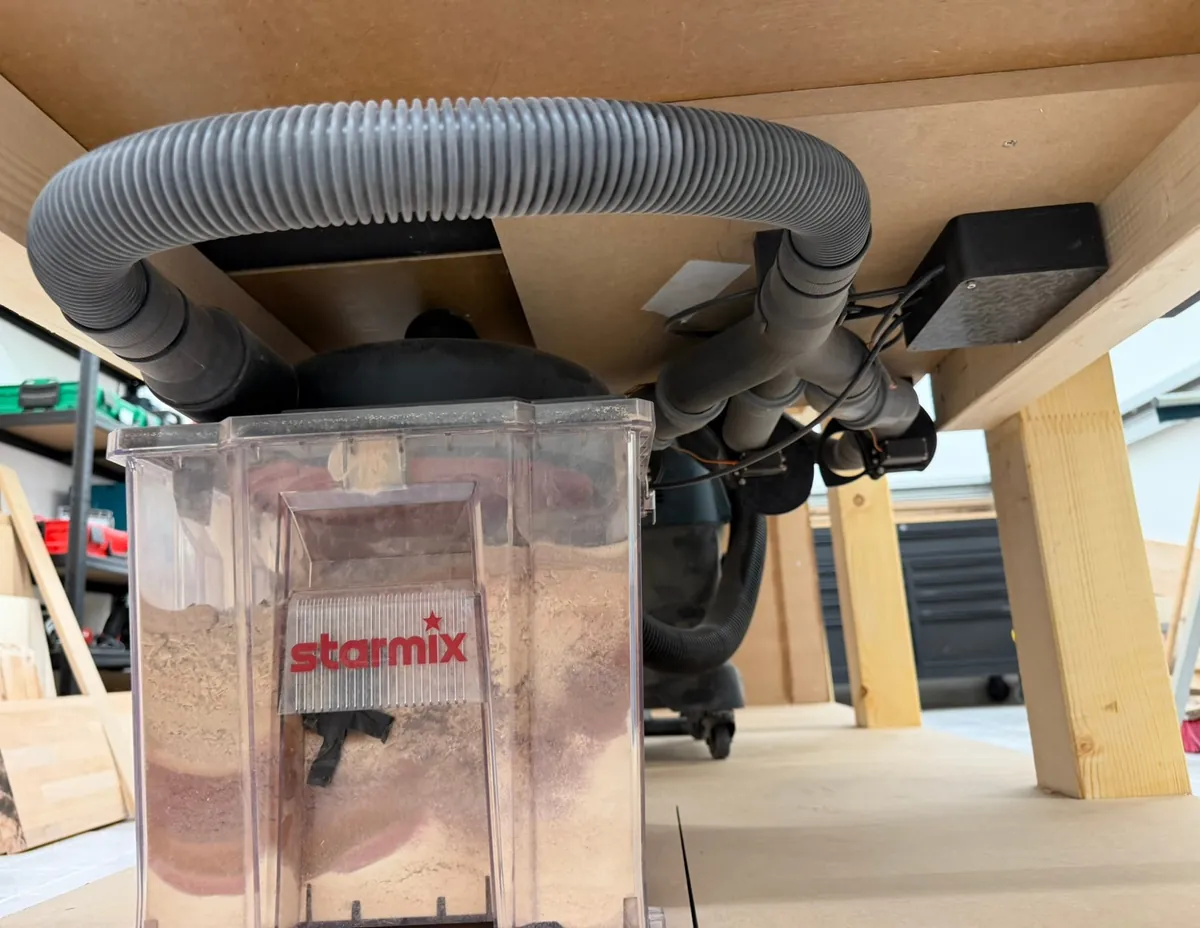
Added afterwards: the cyclone's collection bin, pipes with actuators and a control box under the worktop. -
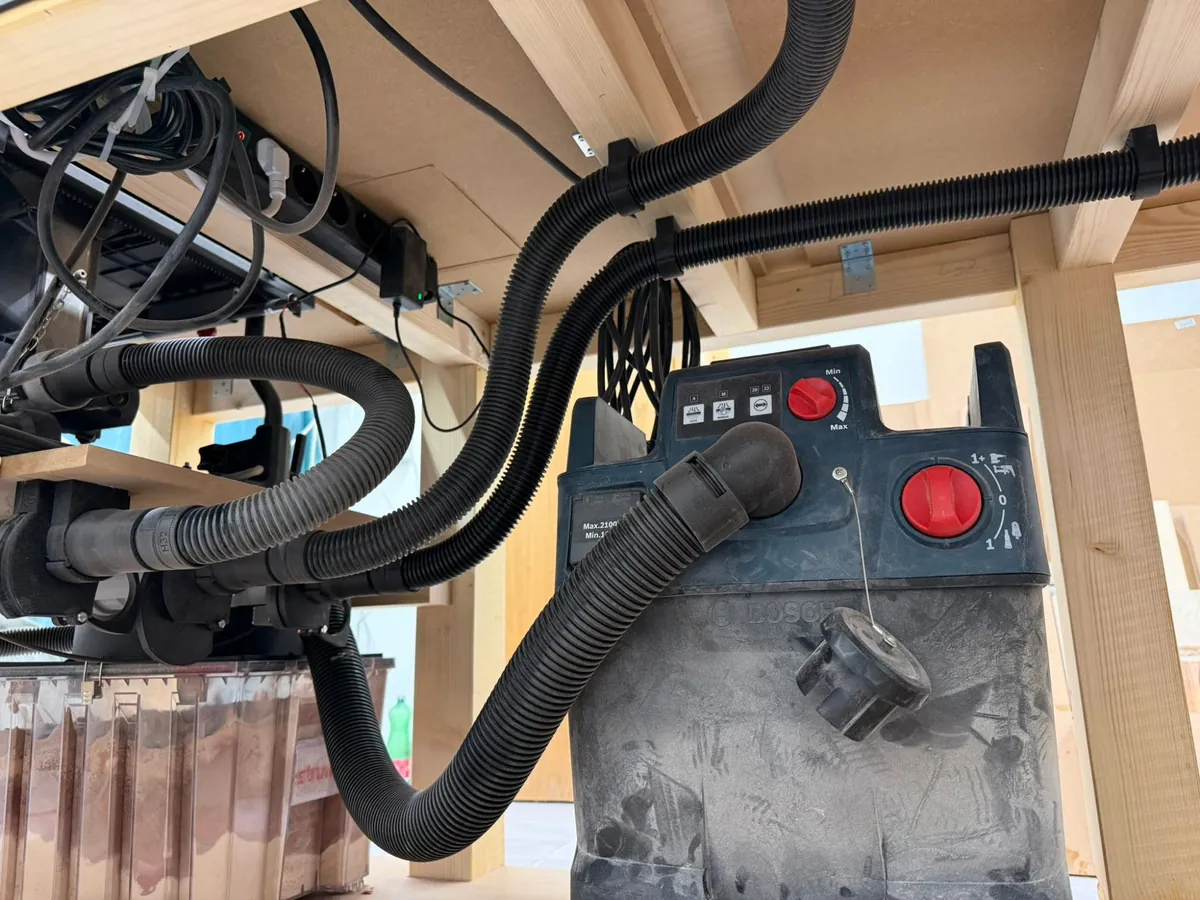
Added afterwards: vacuum and hoses, run in holders under the worktop.
This page is not a build guide for the dust extraction. If you want to add something like it, plan it yourself – and have the electrics and controls connected by someone who knows what they are doing.
Materials and cost
The planner's shopping list gives the timber the way you buy it – not as single parts:
- Spruce timber: 60 × 80 mm in 5 lengths (3 × 4 m, 2 × 5 m), 100 × 100 mm in 2 lengths (2 m and 5 m)
- Sheets: birch plywood 12 mm for the bracing, 18 mm for the shelf, 21 mm for the wear layer and the mounting plate, plus 19 mm MDF for the core layer
- Fittings: wood screws, worktop brackets and angle brackets, plus wood glue
- Casters: 8 swivel casters with brake, Ø 75 mm
At the planner's example prices the materials come to about €740, casters included. Not included are the saw – machines are on the list but not in the total – and the dust extraction added afterwards. Example prices are not current market prices: under Settings › Purchasing you enter your supplier's prices, and the total is right for you.
ParaBuilder3D is a planning aid – not a structural calculation. The load rating of casters and fittings is in the manufacturer's data sheet.
Plan your version
Your workshop is different, and so is your saw – that is what the planner is for. Two ways in:
- Machine bench template: table saw, router table and casters are already in. Switch the router table off under Equipment › Router table if you do not need one.
Open the machine bench in the planner - Like this bench: pick an assembly bench, set the size and the casters and install the saw under Equipment › Table saw – step by step as above.
Open the workbench planner
Drawers instead of a shelf, and which timber suits legs and rails, are covered in two guides in German: Werkbank mit Schubladen and Werkbank aus Konstruktionsholz. All English guides are on the guides page.